SwiftUI学习(4)-状态管理基础
コニクマル撰写
本文使用目前最新版本的xcode 12 + macOS Big sur + iOS14
理解@State
@State 是一个属性修饰符符号,用于读写被SwiftUI管理的数据. 当@State标记的值改变了,页面会重新计算body内容。
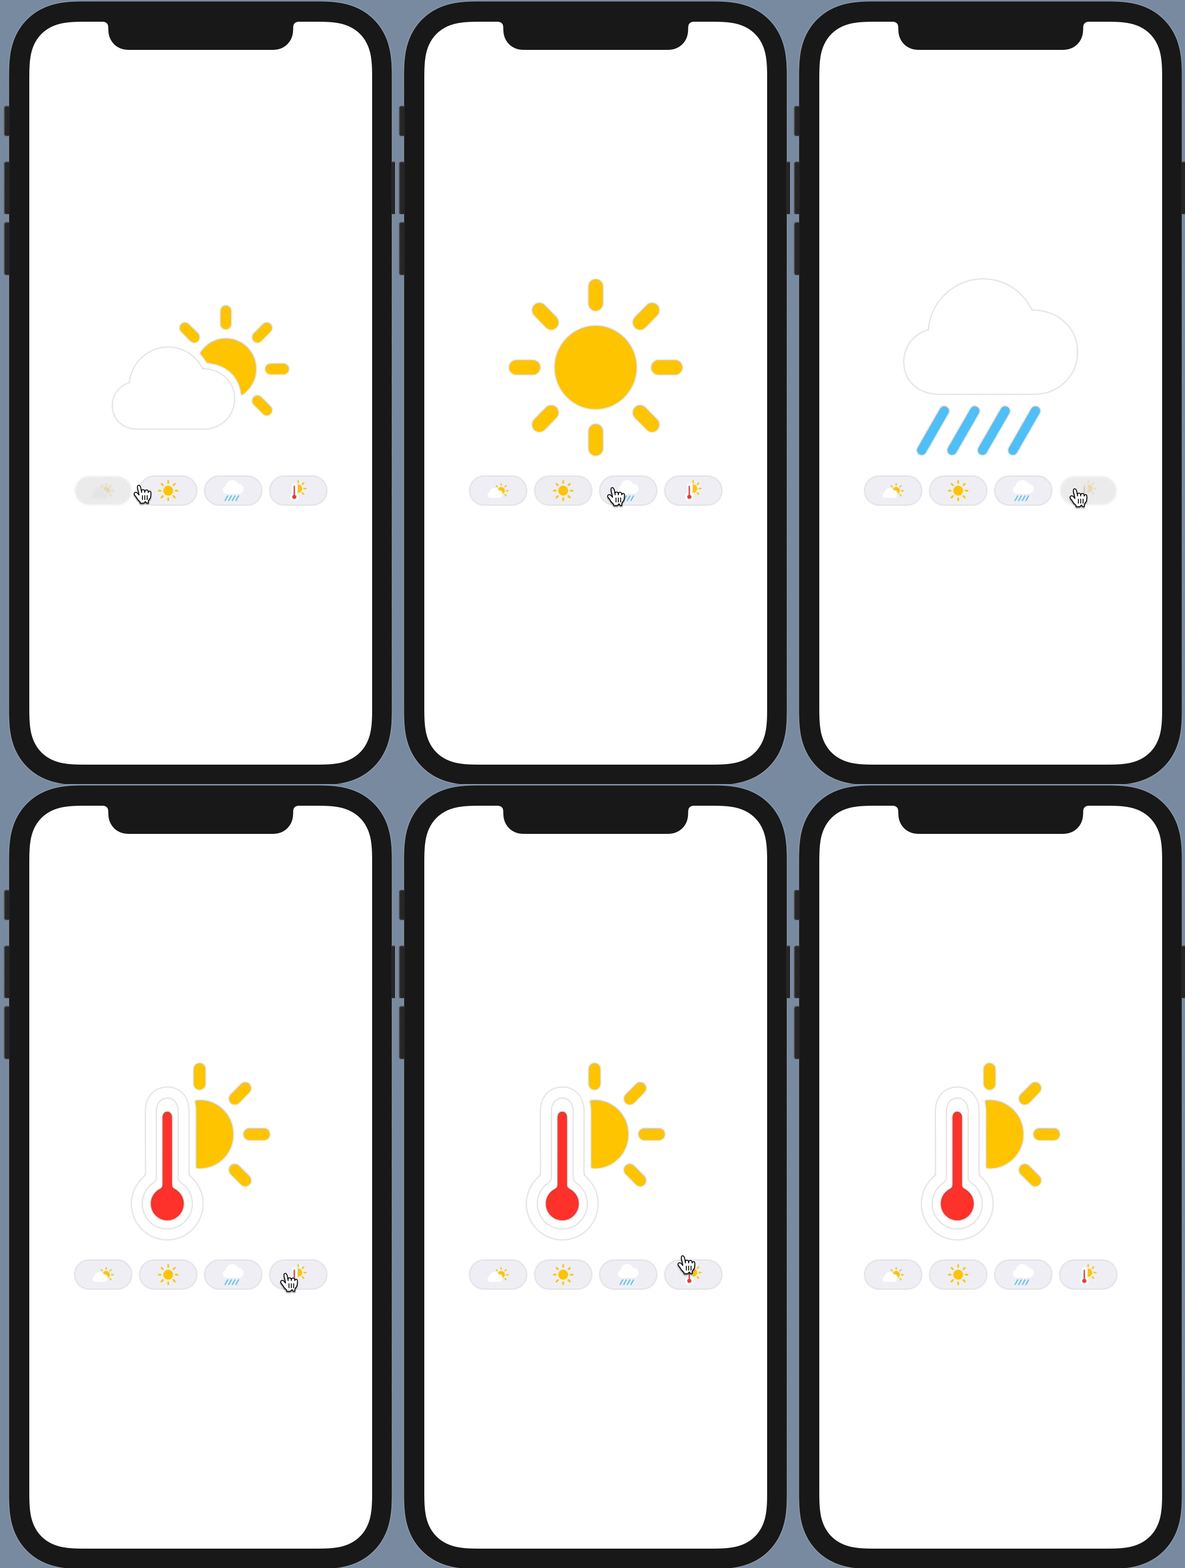
用一个简单的天气APP来说明:
-
创建个
Image来显示天气情况var body: some View { ZStack { VStack { Image(systemName: "sun.max.fill") .renderingMode(.original) .resizable() .frame(width: 100, height: 100, alignment: .center) .shadow(radius: 1) } } }
-
天气情况不是固定的, 不能写死图片名称,要将图片名称改成变量。
var weather = "sun.max.fill" var body: some View { ... Image(systemName: weather) ... } -
在图片下方添加几个按钮来修改当前的天气。
  let contents = ["cloud.sun.fill", "sun.max.fill", "cloud.heavyrain.fill","thermometer.sun.fill"]
  var weather = "sun.max.fill"
  var body: some View {
      ZStack {
          VStack {
              ...
              HStack(spacing: 10){
                  ForEach(contents.indices){index in
                      Button(action: {changeWeather(index: index)}, label: {
                          Image(systemName: contents[index])
                              .renderingMode(.original)
                              .resizable()
                              .aspectRatio(contentMode: .fit)
                              .frame(width: 24, height: 24, alignment: .center)
                              .frame(width: 64, height: 32)
                              .background(Color(.systemGroupedBackground))
                              .clipShape(RoundedRectangle(cornerRadius: 16))
                              .shadow(radius: 1)
                      })
                  }
              }
              .padding()
          }
      }
  }

  func changeWeather(index: Int){

  }
效果如下:

-
点击按钮来修改添加:
func changeWeather(index: Int){
  weather = contents[index]
}
返现报错了。

View是immutable的, 要修改View的内容需要添加变量添加@State的修饰符。修改代码:@State var weather = "sun.max.fill"app像希望的那样运行起来:

SwiftUI是通过State来驱动, 当声明的属性用@State修饰后, SwiftUI会自动管理这个声明的属性,属性变化的时候会去更新,用到该属性的页面元素
@Binding使用
@Bingding是一个属性修饰符可以用来读写其他数据来源的值。使用@Binding建立存储数据和使用数据的view之间的双向连接。比如修改@Binding修饰的值的时候会同时修改对应@State属性的值。
-
接下来改造下个app, 添加一个新的页面把更修改天气的按钮放到新的页面上去。
struct ControlPannel: View{ @State var weather: String let contents = ["cloud.sun.fill", "sun.max.fill", "cloud.heavyrain.fill","thermometer.sun.fill"] var body: some View { HStack(spacing: 10){ ForEach(contents.indices){index in Button(action: {changeWeather(index: index)}, label: { Image(systemName: contents[index]) .renderingMode(.original) .resizable() .aspectRatio(contentMode: .fit) .frame(width: 24, height: 24, alignment: .center) .frame(width: 64, height: 32) .background(Color(.systemGroupedBackground)) .clipShape(RoundedRectangle(cornerRadius: 16)) .shadow(radius: 1) }) } } .padding() } func changeWeather(index: Int){ weather = contents[index] } } -
原来的页面代码修改成:
var body: some View { ZStack { VStack { Image(systemName: weather) .renderingMode(.original) .resizable() .aspectRatio(contentMode: .fit) .frame(width: 200, height: 200, alignment: .center) .shadow(radius: 1) ControlPannel(weather: weather) } } } -
这时候发现点击按钮无法修改天气图标了
在ControlPannel里
@State创建了一个新的状态,在ControlPannel里做得任何修改只是修改了ControlPannel的状态,而不是原来页面的状态。在SwiftUI中修改共享状态的工具是@Bingding,通过@Binding可以使ControlPannel和原页面共享同一个State。 -
把ControlPannel里的@State改成@Bingding修改下:
struct ControlPannel: View{ @Binding var weather: String } -
使用
$符号让来访问@State的包装器(wrapper)var body: some View { ZStack { VStack { ... ControlPannel(weather: $weather) } } }测试一下,工作正常:

总结
- 如果页面不会修改数据,我们可以使用不可修改的属性来存储变量。
- @State来修饰页面需要使用的属性。
- @Binding来修改其他页面的@State属性。